Monday, February 28, 2011

My expectations were derailed!

A business meeting lead me to Tampa, Florida and before the trip I searched for local model railroad stores in the area (like all good model railroaders do!) and discovered "The No. 2 train store in the country" according to their claim (made by others).

What I discovered on the web was H&R Trains located at 6901 US Hwy N. in Pinellas Park, Fl. Below is a picture from there site with their claim to fame. I was excited to be able and see this store especially since it's THE SECOND LARGEST IN THE COUNTRY!!!

Now, I like a good brag as much as the next guy, but come on - lets get real here! He is a picture of the shop from the air and note the car in the lower left to give you some idea of the size of the building.

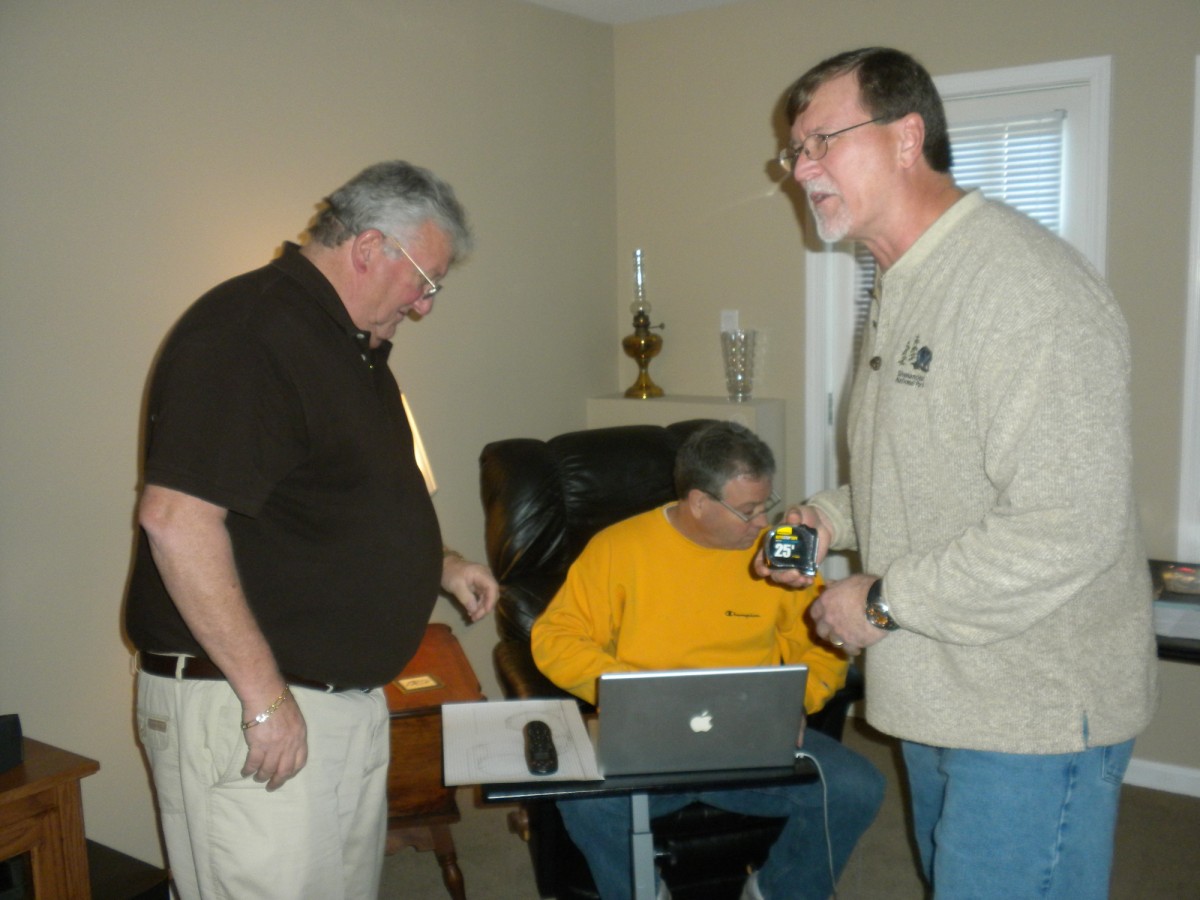
As I entered the store with great expectations I was greeted by the silent stare of a store employee (or owner?) with narly a word of greeting, and while I roamed around NOBODY approached me to greet me or ask if I needed any assistance. And they were NOT busy - there was only one other customer in the building.

So if this building isn't exactly HUGE perhaps it's jammed with inventory? NOT!!! I actually counted the number of HO freight cars around 60! The N scale wasn't that big either. The did have the bigger scales.

I actually did purchase a freight car (reduced their inventory by about 1.6%) along with a couple of other items. When I put my items on the counter to check out the same "friendly" employee (owner) that ignored me to that point continued to be speechless for about 30 seconds (also not wasting eye contact on me!) before he finally "let" me pay.

In summary, if this is the "Number 2 train store in the country", then my little inventory at home would qualify me as "Number 3". If I had the money I'd pay for a round trip ticket for these guys to see TrainMasters - it would knock their socks off!

Rick

(Owner of THE LARGEST RICHLAWN RAILROAD IN THE WORLD!)

Friday, February 18, 2011

It lives on!!!

Guys,

I was in Gainesville today doing a little railfanning waiting by the mainline for some action when I heard a train on a siding switching a grain plant. I walked over and what did I see on the CSX powered train but TWO Family Lines SCL /LN covered hoppers! Now, I know that Ken wouldn't be excited by this even though he's an L&N man because he is a pre - SCL guy. I'm glad to see anything with L&N on it.

I went and had lunch at a local cafe within walking distance and then returned to wait by the mainline. No luck by the mainline; however, the same train with the SCL/LN's was backing onto the same siding and this time it had FOUR of the Family Lines SCL / LN covered hoppers!

Dummy me didn't bring my regular camera, so I used my cell phone to take a number of pictures.

L&N - "Gone, but not forgotten"

Rick

Saturday, February 5, 2011

Richlawn RR Alcove Expansion - Benchwork

The work continues on the expansion of the layout into the alcove area and I've recently installed the joists on the L-girders. The weights are on the benchwork at the right are there because of a nasty twist caused by warped lumber. Once I attached the benchwork to the floor it won't be a problem.

I've never been happy with how flimsy the joists seemed when the risers are attached as the risers act as a "lever" to twist the joists from side to side. I don't like benchwork that isn't rigid, so I added stiffeners to the joists and they are much more rigid now.


The stiffeners are made from 5/8" sandply plywood that I cut using my 50 year old DeWalt radial arm saw. I had a bunch of scrap plywood, so other than the cutting time it was easy.


Here is a closer view of the joist and the stiffeners. The joists are attached to the top of the L-girder from the bottom using 2-1/2" coarse thread drywall screws screwed into pilot holes to avoid spliting the plywood. I attached the stiffeners using 1" coarse thread drywall screws without using glue. I may need to move things around a little bit for turnout motors, ect. and I wanted that to be easy to do.


Here's a little closer view of the stiffeners and joist showing the mounting screws.


Some might say that this is "over-designed" or "over-built", and that might be true; however, I'm all for "over" when it comes to a strong, stable benchwork.

Saturday, January 22, 2011

NCIOG visit to John & Shirley's home 1-22-11

Today we went to John & Shirley's home at their invitation to check out the current and future model railroad plans. In attendance were: Keith, Mark, Ken, Rick, Midge, Bob & Halina. It was nice having the ladies to beautify the get together! We were greeted by a nice welcome sign and a wonderful lunch spread of sandwiches, scrimp, chips, cheese dip, drinks, and homemade brownies! We chatted while we ate and then headed downstairs for the tour.

Welcome!.....to wonderful hospitality and food!

I never thought of organizing my train stuff by putting it on pegboard, but it makes great sense. This wall is in the existing trainroom which is being dismantled.

Keith & Mark discuss all the goodies on John's workbench.


Ken & Midge look on as the rest of us tour the room.


Mark is explaining something very important to Keith


Check out this neat bridge!


Organization is the key to a successful railroad, and John's using plastic drawer to keep everything in order. Note the remains of the bench work from his old layout.


More viewing of the existing layout area - soon to be reclaimed by Shirley.


Here's a view of the new layout room looking from the old layout area. This is a much larger area - thank you, Shirley!


This is the new layout room looking from the other end. The furniture will be moved into the room right behind the photographer.


Bob & Halina arrived a little later than the rest of us and stopped upstairs to grab some food before joining the group.

While the ladies chatted the guys got to work measuring the new room and making a sketch with dimensions for Keith to make get the layout plan in 3rd Planet(tm).


Here's the existing plan that John has drawn up for the new layout.


Keith got to work using John's Apple laptop to attempt to draw up the plan; however, using the Apple was at the "core" of the problem as Keith is used to the PC world. Keith volunteered to take the plan & dimensions home to whip up a 3rd Planet(tm) plan.

We all had a wonderful time and want to say a big Thank You to John & Shirley for their excellent hospitality!

Friday, December 24, 2010

Potter's Pond - in memory of Mr. Potter

My good friend and fellow model railroader Mr. Potter passed away recently and I wanted to post this picture of "Potter's Pond" that is located behind the roundhouse (on my layout) in his memory. Mr. Potter was an avid N scaler that had a super layout featuring over 400 feet of double main line. He will definately be missed!

Rest in peace, my dear friend.


Thursday, December 9, 2010

Curving hardboard for coved corners

I recently added curved (coved) corners in the train room addition using the "brute force" method. I took flat hardboard 4' x 8' x 3/16" panels and forced them into the corner. This was an extremely difficult and frustrating method.

I'm getting ready to cove a corner in the expansion area and decided to use a curving method that I had used previously on some fascia board they worked very well. Here are the steps (refer to the picture below):

1.) Clamp boards on the edges using C-clamps evenly spaced (spring clamps will NOT work for this).
2.) Tie a rope to one of the end C-clamps and thread it through the other clamps going back and forth from side to side.
3.) Push on the face of the hardboard to start the curve and then tie off the other end of the rope.
4.) Wet the back (unfinished side) of the hardboard - I used a pump up sprayer because of the size of the panel. You just need to wet the back - don't soak it.
5.) Wait for awhile (I never looked at the clock) for the hardboard to "relax" a little.
6.) After waiting push down on the long edge "just enough" (I don't know what that is, but I do know what "too much" is!) and tighten up the rope. Take your time so you don't break it!
7.) Repeat steps 4 - 6 as many times as necessary to get the curve that you want. NOTE: the board will relax quite a bit back to its original shape when the rope is released so you will need to curve more than the final curve. If you're looking for a 90 degree curve you will need to curve is 110 degrees or more.
8.) After the back of the hardboard is COMPLETELY dry seal it with a good grade sealer. NOTE: latex paint is not a sealer.


Saturday, December 4, 2010

Paul's "Reality Check" block of wood video

Well, you had to be there, but you see.....Paul had this block of wood...and he was racing around the basement with it held high...... Enjoy!